NiFi is an interesting ETL software that I haven’t been able to apply to any project yet, but out of curiosity I have put together this sample workflow - mostly as documentation to myself. The steps below describe how to initialise NiFi and a PostgreSQL instance using docker-compose, how to create a workflow and how to configure it to send CSV files to postgresql.
1 - docker-compose
The following docker-compose.yaml file defines:
- A PostgreSQL container with a predefined root user, password and a database
- A NiFi container dependant on the successful creation of the PostgreSQL container
version: '3'

services:

  nifi:
    image: apache/nifi:1.14.0
    container_name: nifi_test
    restart: always
    ports:
      - "8080:8080"
    environment:
      - NIFI_WEB_HTTP_PORT=8080
    links:
      - postgres:postgres
    depends_on:
      - postgres

  postgres:
    image: postgres:13.4
    container_name: postgresql_test
    restart: always
    environment:
      POSTGRES_USER: root
      POSTGRES_PASSWORD: fry
      POSTGRES_DB: test_db
2 - Start the containers
Navigate to the folder where you saved the file above and run docker-compose up -d to start. If everything is alright your terminal will print something like
Creating network "nifi-postgres_default" with the default driver
...
Creating postgresql_test ... done
Creating nifi_test       ... done
Now you should be able to access NiFi on your browser at http://localhost:8080/nifi.
Note however that NiFi may take a couple of minutes to start.
3 - Create a NiFi workflow
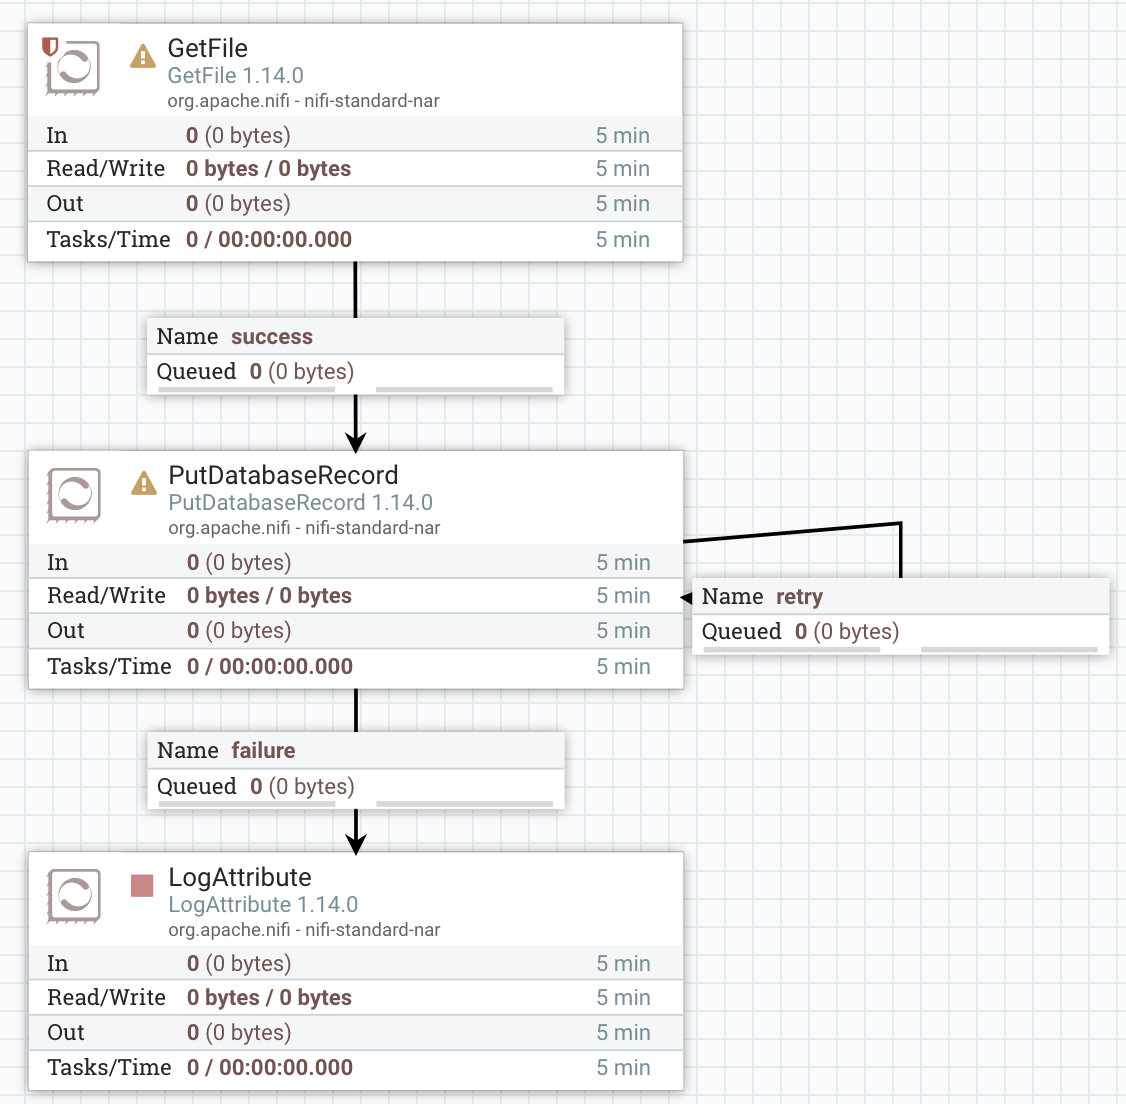
A basic workflow to send CSV files to a database table can be created using the following processors:
- GetFile to read CSV files
- PutDatabaseRecord to send the CSV data to a database table
- LogAttribute to log errors when inserting records on the database
You can drag and drop the connectors yourself or use this template. Save it as CSV-File-To-PostgreSQL.xml and then upload it to NiFi.
4 - Configure the GetFile processor
In order to feed NiFi CSV files that can be loaded into the database table we need a place where to place the files within the NiFi container. We can create a folder to that by running:
docker exec -it nifi_test \
  mkdir test_csv_files
Now we are reaedy to configure the GetFile processor. Right-click on it and on Configure » Properties enter /opt/nifi/nifi-current/test_csv_files as the value for the field Input Directory.
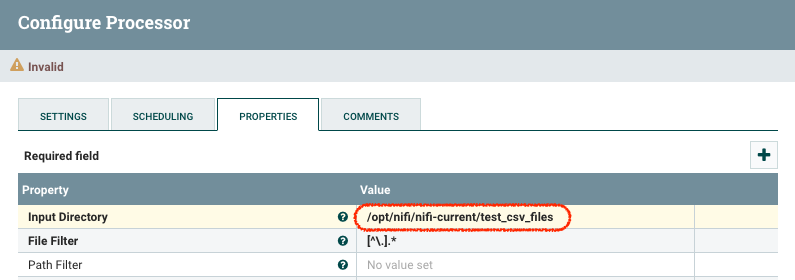
If the processor is configured correctly the icon at the top left corner will now be a red square, which indicates that the processor is correctly configured and it is stopped.
5 - Create a database table
To create a table in the database initialised by the postgreSQL container, we can access directly the postgres instance running in the container and create a simple one with two fields, field_one and field_two, both of type TEXT.
docker exec -it postgresql_test psql test_db -U root

CREATE TABLE test_table (field_one TEXT, field_two TEXT);
6 - Download the postgreSQL JDBC driver
The postgreSQL JDBC driver needs to be available to NiFi in order to communicate with the database. Search online for postgresql jdbc driver and you should be able to find the official PostgreSQL page about it. At the time of writing the latest available version is PostgreSQL JDBC 4.2 Driver, 42.2.23. Note that you don’t need to download it, instead copy the link of the download - which should look something like https://jdbc.postgresql.org/download/postgresql-42.2.23.jar and execute on the terminal the following command to download the file directly in the container folder /opt/nifi/nifi-current/lib/ with the name postgresql-42.2.23.jar- taking into account that the version available to you might be different.
docker exec -it nifi_test \
  curl https://jdbc.postgresql.org/download/postgresql-42.2.23.jar \
  --output /opt/nifi/nifi-current/lib/postgresql-42.2.23.jar
7 - Configure the PutDatabaseRecord processor
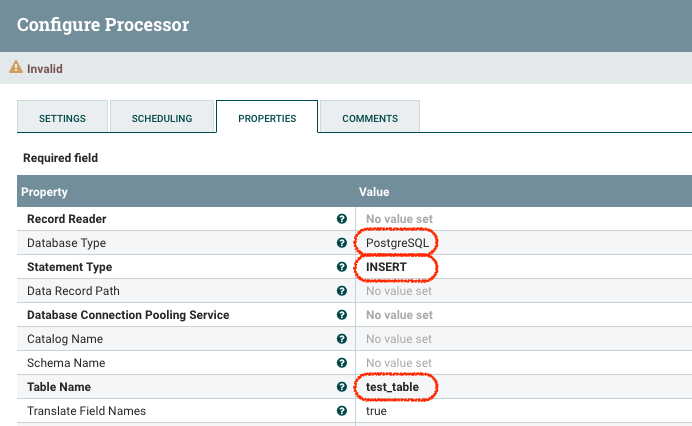
Database detail properties
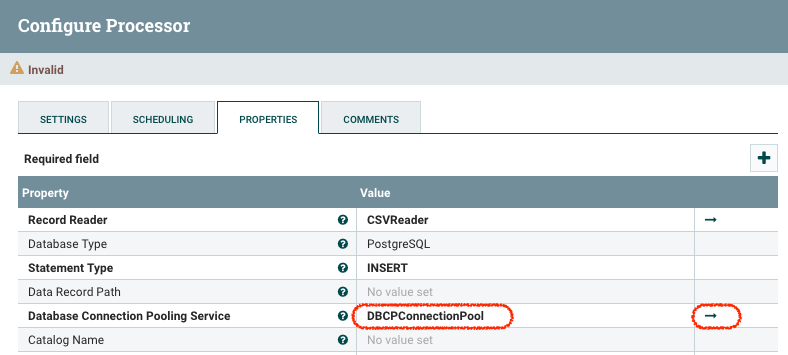
Right-click on the PutDatabaseRecord processor and on the properties tab set the following properties
- Database Type = PostgreSQL
- Statement Type = INSERT
- Table Name = test_table » the table created on step 5
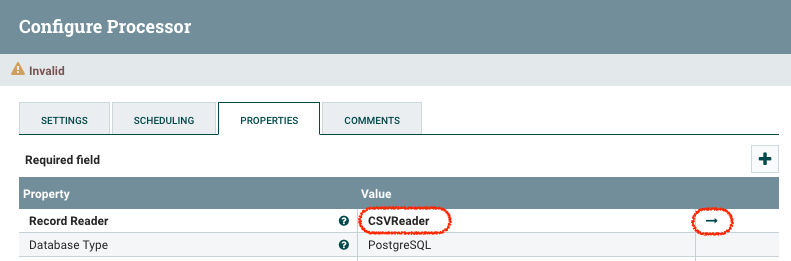
Configure the Record Reader properties
Right-click on the PutDatabaseRecord processor, go to the properties tab, click on Record Reader » Create new service… and select CSVReader » Create. Now the field Record Reader should be CSVReader and there should be an arrow on the column to the right. Click on it to configure the CSVReader controller service.
Click on the cog icon that appears on the right-most column to define the properties of the controller and set the properties Schema Access Strategy = Use ‘Schema Text’ Property. A new property will appear named ‘Schema Text’. Its default value is ${avro.schema}, indicating that it needs to be specified in Avro format, so use the following to match the table columns created in step 5:
{
  "type": "record",
  "name": "test",
  "fields": [
    {"name": "field_one", "type": ["string", "null"]},
    {"name": "field_two", "type": ["string", "null"]}
  ]
}
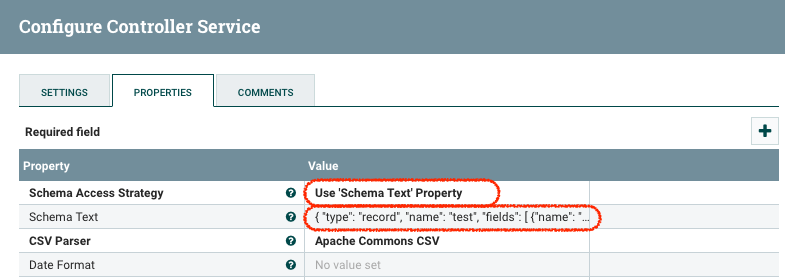
Click ‘Apply’ to save the changes and before exiting the Controller Services panel click on the bolt icon to enable the CSVReader service.
Configure the Database Connnection Pooling Service properties
Right-click on the PutDatabaseRecord processor, go to the properties tab, click on Database Connnection Pooling Service » Create new service… and select DBCP Connection Pool » Create. Now the field Database Connnection Pooling Service should read DBCP Connection Pool and a there should be an arrow on the column to the right. Click on it to configure the DBCP Connection Pool controller service.
Click on the cog icon that appears on the right-most column to define the properties of the controller and set the following properties
- Database Connection URL =
jdbc:postgresql://postgres:5432/test_db» Note that thanks to the links property on the docker-compose file - lines 13 and 14 - we can call the postgresql database address by name - postgres - running on its default port - 5432 - and connecting to the database that was also initialised by the docker-compose file - Database Driver Class Name =
org.postgresql.Driver - Database Driver Location =
file:///opt/nifi/nifi-current/lib» The location we downloaded the driver to on step 6 - Database User =
root» As defined in the docker-compose file - Password =
fry» As defined in the docker-compose file
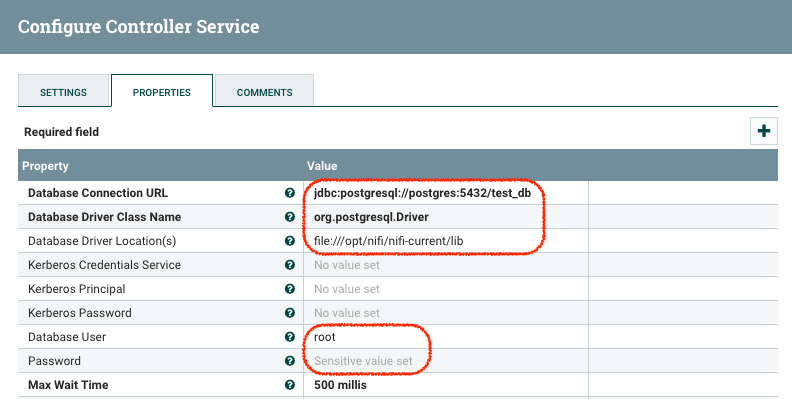
Click ‘Apply’ to save the changes and before exiting the CONTROLLER SERVICES panel click on the bolt icon to enable the DBCPConnectionPool service.
8 - Define the relationships betweem processors
If you haven’t done so yet, you need to link the different processors to create a workflow. To do that click around the centre of a processor and drag it to the processor you would like to connect it with, determining when releasing the mouse the relationships that you want to establish between them. The relationships in this case are as follows:
- GetFile to PutDatabaseRecord » Relationship success
- PutDatabaseRecord to LogAttribute » Relationship failure
- PutDatabaseRecord can be linked to itself on relationship retry
- PutDatabaseRecord auto-terminate on success
- LogAttribute auto-terminate on success
9 - Start the processors
All the processors should now display a red square at their top right corner and they are ready to be started. Right-click on each of them and click on ‘Start’. The red square will become a green ‘play’ triangle.
10 - Generating CSV files to load into the database
Now that the workflow is ready to ingest CSV files we can create one test.csv and populate with a few value pairs. For example:
test-1, description-1
test-2, description-2
test-3, description-3
And copy that file into the folder we created on step 4 using the following command, replacing the
docker cp \
  <local-path-to-csv-file> \
  nifi_test:/opt/nifi/nifi-current/test_csv_files
In my case
docker cp \
  /Users/juan.carlos.mayo/nifi-postgres/csv-files/test.csv \
  nifi_test:/opt/nifi/nifi-current/test_csv_files
11 - Inspect the workflow and database
If you inspect the NiFi workflow you should see that one file has gone through, and if you inspect the database you should see that the records were indeed processed and appear in our test_table
docker exec -it postgresql_test psql test_db -U root

SELECT * FROM test_table;

field_one |   field_two
-----------+---------------
test-1    | description-1
test-2    | description-2
test-3    | description-3
(3 rows)